If you’re living the RV life, boondocking in the middle of nowhere, or just tired of buying plastic bottled water every time you hit the road, a proper reverse osmosis (RO) water system for your RV isn’t a luxury—it’s a game-changer. Let me tell you, as someone who’s been selling and troubleshooting RO setups for RVs for years, it’s way simpler than most people make it sound. No fancy tools, no complicated plumbing degree needed—even if you can barely change a tire, you can knock this out in a Saturday afternoon. I’m gonna walk you through every step, skip the jargon, and call out all the small mistakes people make that turn a easy install into a headache. RO Water System
First, let’s get the basics straight: why RV RO is different from a whole-house RO setup. RVs are tight, mobile, and their plumbing can take a beating. A regular home RO is big, plumbed into a fixed water line, and runs on constant pressure—but your RV’s water is either from a fresh water tank, a city hookup, or a generator-powered pump, so you need a system that’s compact, pressure-regulated, and doesn’t leak when you hit a pothole. That’s exactly what we design and supply—we size every kit for small RVs, toy haulers, Class A’s, whatever, so it fits without eating up all your storage space.
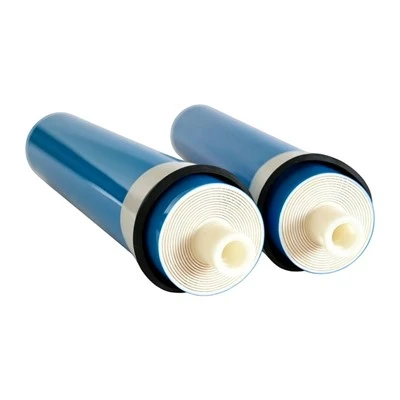
First step: pick the right kit for your rig. Wait, I know, you’re probably scrolling Amazon and seeing a dozen “RV RO” kits that look cheap, but trust me, skip the no-name brands. You want one that comes with all the parts you need, not just the main RO unit. Let’s break down what your kit must include: a 5-stage RO membrane (the heart that strips out 99% of contaminants like lead, chlorine, bacteria—stuff tap water even from campgrounds has), a pre-filter (sediment, carbon, to keep junk out of the membrane), a pressure regulator (RV water pressure can spike up to 100 PSI, which blows RO parts), a storage tank (usually 2-4 gallons, perfect for small RVs), a faucet (for inside your galley), and all the tubing and adapters to hook into your RV’s plumbing.
Pro tip from someone who’s seen people mess this up: measure your available space first. If you’ve got a tiny travel trailer with a 12-inch deep under-sink cabinet, don’t buy a 10-inch RO unit—you’ll be stuck shoving it in and crimping tubing. Most of our kits are 8 inches wide, 10 inches deep, so they fit almost every RV under-sink spot, or even a small compartment in a Class C’s storage bay.
Now, tools you’ll need—let’s make this short, no specialty stuff: a drill, a hole saw (1/4-inch for the faucet, 1/2-inch for the pressure regulator if you’re mounting it outside), a adjustable wrench, a Phillips head screwdriver, Teflon tape, and a bucket (to catch water, duh). That’s it. You don’t need a soldering iron, you don’t need plumbers cement—all the connections are push-fit, which means no leaks if you do it right.
Step 1: Prep your RV’s water system. First, turn off the water supply. That sounds obvious, but so many people skip this. If you’re hooked up to a city water line, close the valve at the inlet. If you’re using the fresh water tank, disconnect the pump power or turn off the valve leading to your taps. Then, open a hot and cold tap inside the RV to drain all the leftover water. This stops you from getting soaked mid-install, trust me.
Step 2: Mount the key parts. Let’s start with the RO unit and storage tank. The best spot is under your galley sink—most of the time, that’s where you’ll have empty space, and it’s close to your taps. If your cabinet is tiny, you can mount the storage tank outside, like in a storage compartment or even under your RV’s frame (just make sure it’s secured so it doesn’t bounce loose on bumpy roads). Now, the pressure regulator: this is non-negotiable. RV water pressure is not like home pressure—campground hookups often run 80-100 PSI, which is way too high for RO parts. Mount the pressure regulator right at the inlet where your water comes into the RV, before any taps. Drill a small hole if you’re mounting it outside, or just use the included self-tapping screws if it’s going inside. Make sure to secure all parts tightly with those screws, not just tape—road vibration will make loose parts come undone.
Step 3: Hook up the plumbing. This is the part where people get nervous, but push-fit tubing makes it easy. Let’s go one connection at a time. First, run the main water line: cut your RV’s incoming water line (after the pressure regulator, remember) where you want to split it to go to the RO unit. Take Teflon tape, wrap it around the threads of the adapter fitting, screw the adapter into the cut line, then push the tubing onto the adapter until you hear a “click” that means it’s locked. No leaks here—if it drips after you turn the water on, just pull the tubing out, cut 1/4 inch off the end to get a fresh, flat cut, and push it in again. Next, connect the pre-filter and RO unit: your kit will have a diagram, so just follow the flow arrows (super important—if you hook the pre-filter backward, it won’t work). Then, connect the RO unit to the storage tank. The storage tank has a little valve on top—don’t forget to open that later, or you won’t get any water from the RO. Finally, run a tube from the RO unit to the new faucet you drilled into your sink.
Wait, the faucet: when you drill that 1/4-inch hole, make sure you’re not hitting any wires or water lines under your sink. Hold a flashlight up, check the back of the sink first, mark where you want the faucet, then drill slow. Push the faucet through from the top, tighten the nut from below, and connect the tubing. That’s it. No need for plumbers to mess with it.
Step 4: Test for leaks and prime the system. Okay, now the part everyone worries about—turn the water supply back on slowly. Don’t just yank the valve open, you’ll get a shock of pressure that blows a seal. Watch every single connection for drips for 5 minutes. If nothing’s leaking, great. Now, you need to prime the RO membrane to get rid of that funky factory smell (some people say it tastes like plastic, but it goes away fast). How? Run the faucet for 10 minutes straight—this flushes out the carbon and the membrane. The first gallon or two might taste a little off, that’s normal. After that, your water should be crystal clear, no chlorine, no weird tastes.
Now, common mistakes I see all the time, that even seasoned RVers mess up: First, forgetting to change the pre-filter every 6 months. That’s not a “set it and forget it” system. The pre-filter catches all the dirt and gunk from campground water, so if you skip changing it, it clogs up, and the RO membrane gets ruined (and membranes cost like $80 to replace, which is way more than a $10 pre-filter). Second, not securing the storage tank. I had a customer last month say his tank fell out of the storage bay while he was driving through the Rockies—total disaster. We add extra straps with every kit now, so use ’em. Third, not regulating pressure. If you skip the pressure regulator, your RO parts will leak within a year, guaranteed. That’s why we include a high-quality regulator in all our kits—no skimping.
Another pro tip: if you boondock a lot and your fresh water tank has hard water or minerals, add a extra carbon filter to your kit. We can customize that for you, no extra hassle. Also, if you have a Class A motorhome and you’re running a bigger system, we have 5-gallon storage tanks for those, too. The great thing about our systems is they’re compatible with all RVs, whether it’s a tiny pop-up trailer or a big luxury motorhome.
Wait, you might be wondering: what about when I’m dry camping, and running off my fresh water tank? Does this system work then? Absolutely. Just hook the pressure regulator to your RV’s water pump, and it’ll work the same way. The pump’s pressure is around 40-50 PSI, which is perfect for RO. No extra parts needed.
So why bother with an RO system anyway? Because campground water, even the “drinkable” stuff, has chemicals, microplastics, and sometimes bacteria that regular RV filters don’t catch. I’ve had customers tell me they stopped getting sick after installing one, their coffee tastes way better, and they don’t have to buy bottled water ever again. On a long road trip, that adds up to hundreds of dollars saved, plus less plastic trash to deal with.

Now, let’s wrap this up. If you’re ready to upgrade your RV’s water, we’ve got kits for every size rig, we include free step-by-step video guides (way easier to follow than a text diagram), and our customer support is actual people who know RVs, not a call center. We’re not a big box store—we’re a small company that lives the RV life too, so we built these kits because we got tired of bad RO systems that broke after a month. If you have questions about what kit fits your rig, or you want to customize a system, hit us up—we’re here to help.
High Temperature EDI Module References: 1. “RV Water System Basics” – RV Technical Institute, 2022. 2. Reverse Osmosis System Maintenance Guide – Water Quality Association, 2023. 3. “Mobile Water Treatment for Recreational Vehicles” – Journal of Recreational Vehicle Engineering, 2021.
Fujian Huamo Technology Co., Ltd.
Fujian Huamo Technology Co., Ltd. is one of the most professional ro water system manufacturers and suppliers in China, featured by quality products and good service. Please rest assured to wholesale the best ro water system made in China here and get price list from our factory. Contact us for custom service and OEM service.
Address: No.6 Hengtong Rd, Shanmei Village, Xiamei Town, Nanan City, Fujian Province, China
E-mail: info@huaromembrane.com
WebSite: https://www.hmromembrane.com/
